Alerts and subscriptions
Alerts let you and your team stay informed without needing to open a canvas. At scheduled times, Count captures the latest results and sends them via email or Slack, so you can keep stakeholders up to date automatically.
What can be alerted?
Alerts can be created from three types of objects:
- Cells or visuals – sends an image of the cell or chart, including any visible inputs and outputs.
- Frames – sends an image of everything inside the frame (the frame border itself is excluded).
- Reports – sends one image for each report frame.
When an alert runs, Count re-executes the necessary queries in your canvas and then sends screenshots to the chosen destinations.

Creating an alert
You can add alerts from:
- The floating controls on a cell, visual, or frame.
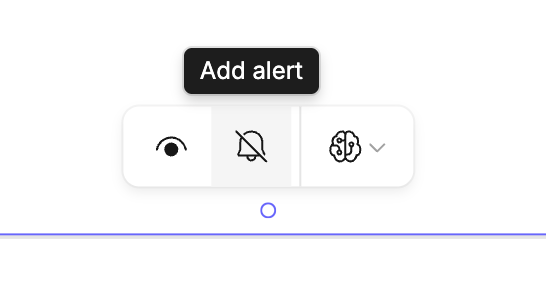
- The Alerts tab in the right-hand sidebar using the
+button.

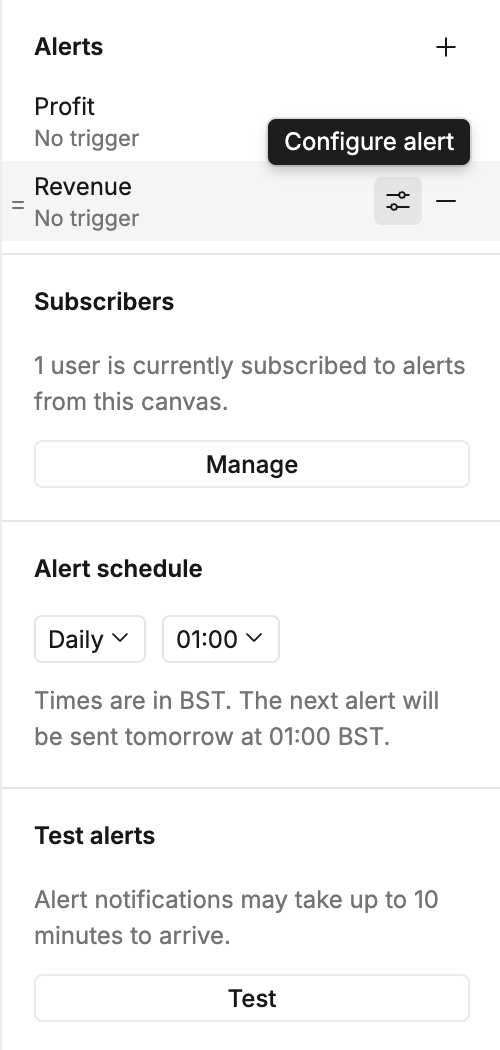
Once created, all alerts for the canvas are listed in the Alerts sidebar.
Scheduling alerts
Default schedule
Each canvas has a single default alert schedule that all alerts follow. This is set in the Alerts sidebar.
- Choose from simple options (hourly, daily, weekly, etc.).
- For more advanced timing, use 'Custom' and a cron expression.
- Example:
0 8 * * 1-5→ sends alerts at 8AM every weekday.
- Example:
Alerts can run up to once per hour. More frequent cron schedules will be rejected.
Alerts respect your canvas caching settings. Make sure your cache duration isn’t longer than your alert frequency, or you may see old results in your alerts.
Individual alerts can override the default by defining their own schedule. This is done by accessing the Configure alert menu next to the alert name:
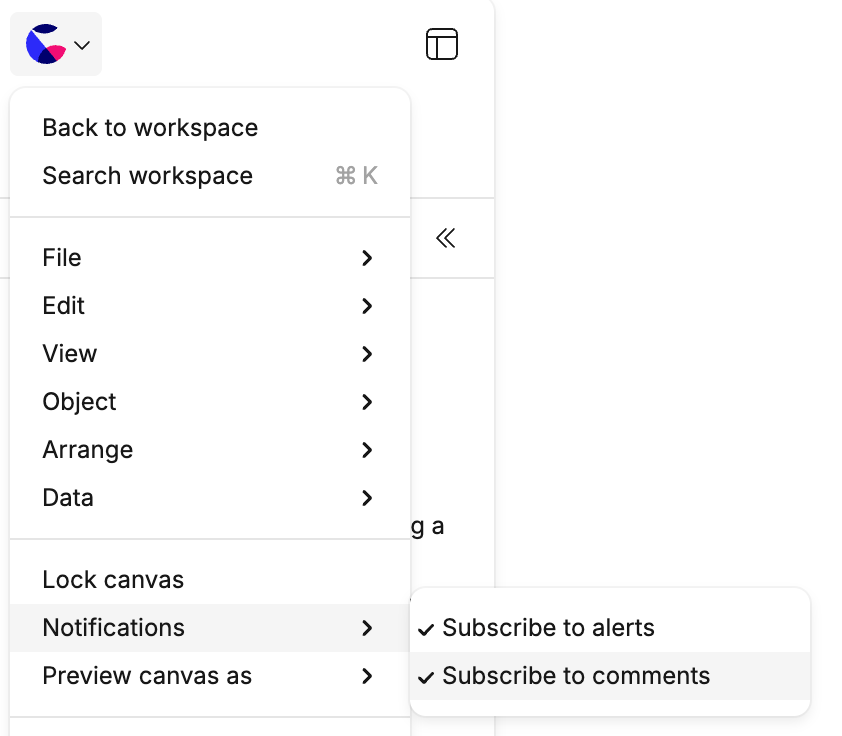
Subscribers
From the Alerts sidebar you can add and manage who receives alerts.
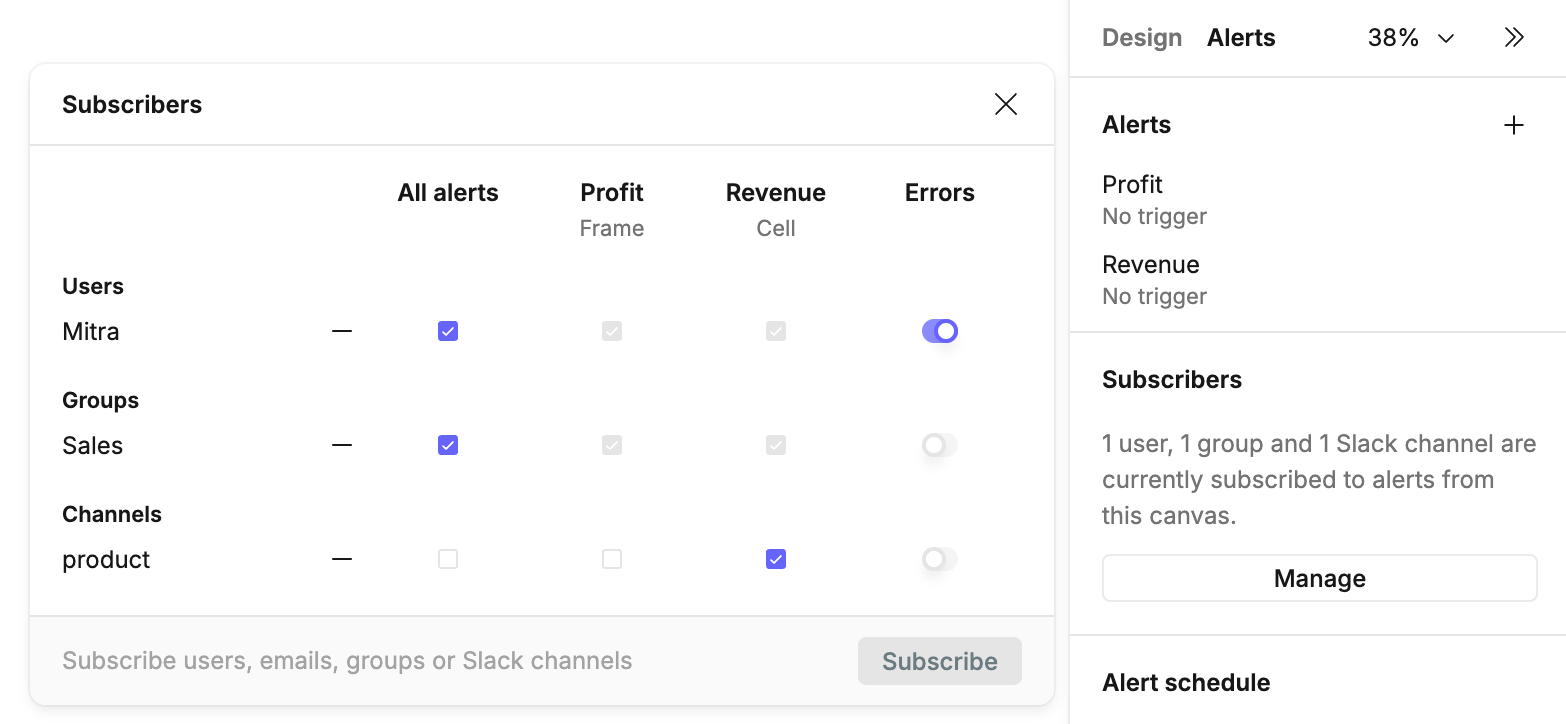
Who can subscribe
- Workspace members – receive alerts by email, and optionally via Slack if their Slack account is connected.
- Workspace groups – if enabled, alerts are sent to all members.
- Slack channels – alerts are posted directly to a channel (requires Slack connection).
- Email addresses – alerts can be sent to external emails.
Additionally:
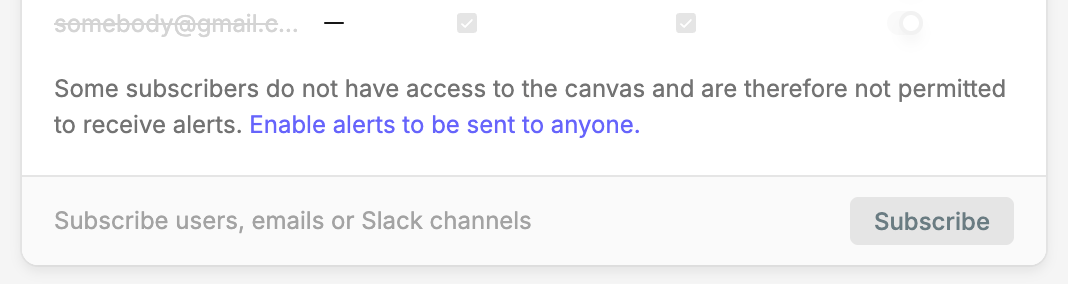
- If a subscriber does not have permission to view the canvas, they will not receive alerts unless public alerts are enabled in workspace settings. In this case a warning message will be displayed (see below)
- If subscribers receive an alert and do not have a Count account or access to that canvas, then the alert will not include a link to the canvas.
Managing subscriptions
- Use the checkboxes to choose which alerts a subscriber receives.
- Use the subtract icon to remove a subscriber.
- By default, subscribers also get error reports if an alert fails. You can toggle this off.
- Individual users can opt out from their canvas menu and will not appear in the alert subscribers list.
Alert options
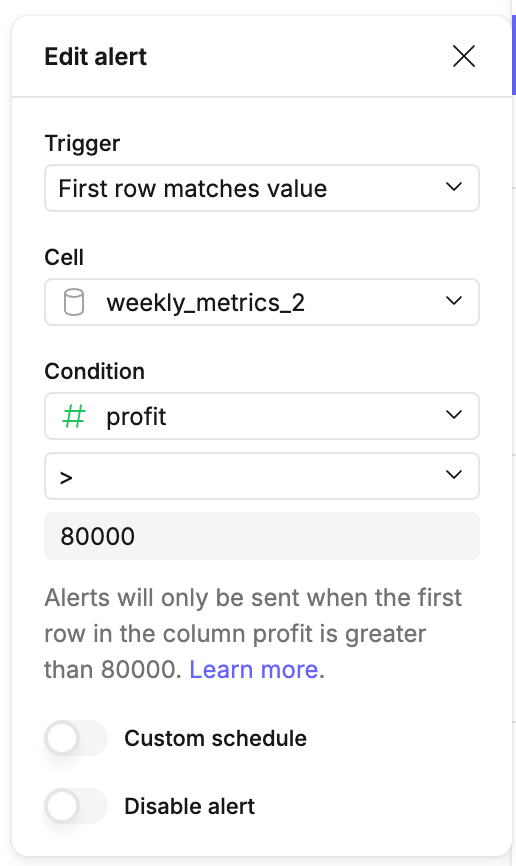
Click the settings icon on any alert to configure options:
- Trigger – conditions under which the alert should send (see below).
- Custom schedule – override the default schedule.
- Include data – if enabled, for a cell or visual alert include a link to a CSV file containing up to 10,000 rows of the data for that cell or visual. If the canvas is deleted, this link will stop working.
- Include PDF - if enabled, include a PDF copy of the alert as an email attachment or Slack message reply. (Available on Scale plans and higher.)
- Disable alert – turn off the alert without deleting it.
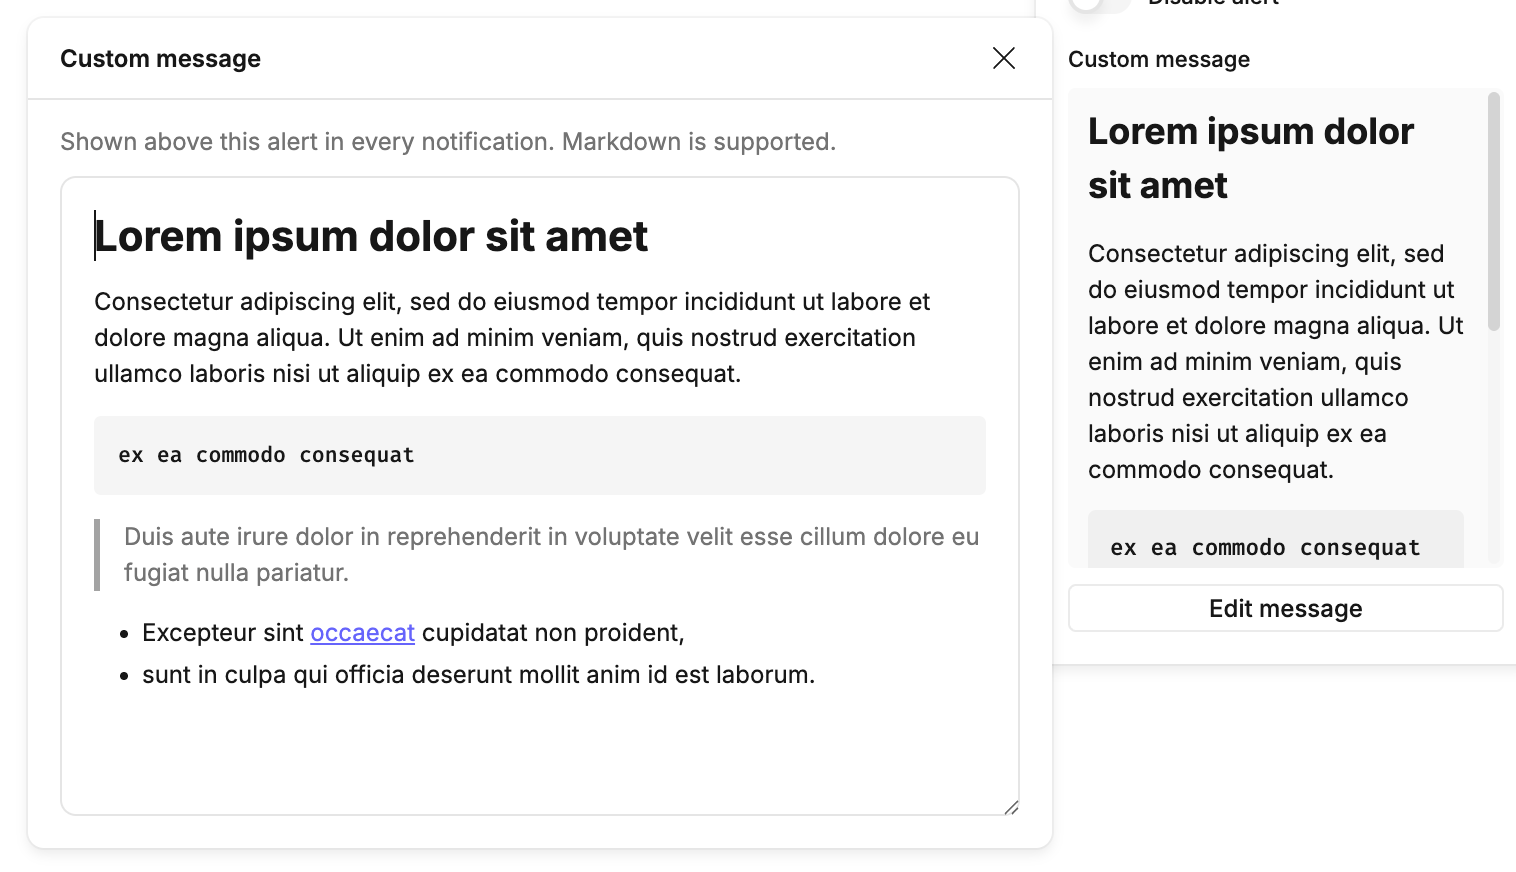
- Custom message - include a custom message alongside this alert (see below).
You can also reorder alerts in the sidebar — this order determines the order of alerts in the notifications that are sent.

Custom alert messages
Custom messages can be added to alerts as rich text. Click the Add message button to open the custom message editor, which accepts rich text formats, code blocks, lists and links. Use normal markdown shorthand and keyboard shortcuts to format text.
Custom messages are added to alert notification emails and Slack messages as rich text just above the alert image output.
Alert triggers
Triggers control when an alert actually fires. For alerts on cells, the condition will relate to the cell itself. For frames or reports, the condition can relate to any cell in the canvas. Options include:
- None – always send at the scheduled time.
- Rows returned / No rows returned – trigger only if a query does/does not return rows.
- Query error / Query does not error – trigger based on query success or failure.
- First row matches value – trigger if the first row in a column matches a set value (text, number, or null).
Testing alerts
Use the Test button in the Alerts sidebar to send a sample notification.
- Test alerts respect subscriber settings, so you can confirm delivery.
- If a trigger condition isn’t met, the alert will still be listed with a message explaining why it didn’t fire.
Troubleshooting
Private channels may not show in the list. In this case, run /count subscribe directly in the private channel and select the canvas from the list.
Queries must finish within 10 minutes. Try:
- Simplifying or optimizing the query.
- Scheduling alerts at off-peak times.
- Enable scheduled queries for your canvas, and configure the query schedule such that queries are executed before alerts are scheduled. This will allow any long running queries to complete and the results cached before an alert is triggered. When the alert is the triggered the cached results will be used instead of executing a new query.
- Check your spam folder.
- Confirm your address is listed in the alert subscribers (if you are an analyst).
- Ensure you haven’t disabled notifications in your account settings.
- Ensure you haven’t opted out of this canvas’s alerts.
Alerts may take 15–20 minutes to arrive depending on load. If delays are frequent, schedule them at a less busy time.
Alerts use canvas caching. If caching is set to a long duration, results may be reused instead of re-run. Adjust the cache settings to ensure alerts always show fresh results.
• Subscriber Options Applied: All the subscriber options you've configured for that alert will be applied during the test. This allows you to confirm that the correct subscribers will receive the notification.
• Trigger Evaluation: If the alert has a trigger condition set, Count will evaluate whether that condition is currently met.
• Notification Behavior:Trigger Not Met: If the trigger condition is not met during the test, the test alert notification will still include this alert but with a message indicating that the trigger was not satisfied. This ensures you know the alert configuration is working even if the data doesn't currently meet the criteria.Trigger Met (or No Trigger): If the trigger condition is met (or if the alert has no trigger), a test notification containing the alert's content will be sent to all selected subscribers.
Use the test button to ensure your alert subscribers and trigger logic are set up as expected.