Setting up your workspace
So, you're ready to start your journey with Count - we're excited to see what you're going to achieve.
To get going, you need to set up a workspace. This tutorial will introduce you to the Count workspace and lay out some simple steps to start your set up.
Tutorial summary
This tutorial introduces Count Workspace fundamentals, covering workspace structure (data, members, projects, canvases), user roles and permissions, data connections, project management, and canvas organization to help you confidently navigate and utilize your workspace.
What you will learn
Follow these easy steps to create your workspace:
1. Create your workspace - create a free account or join your organization's workspace to get started quickly.
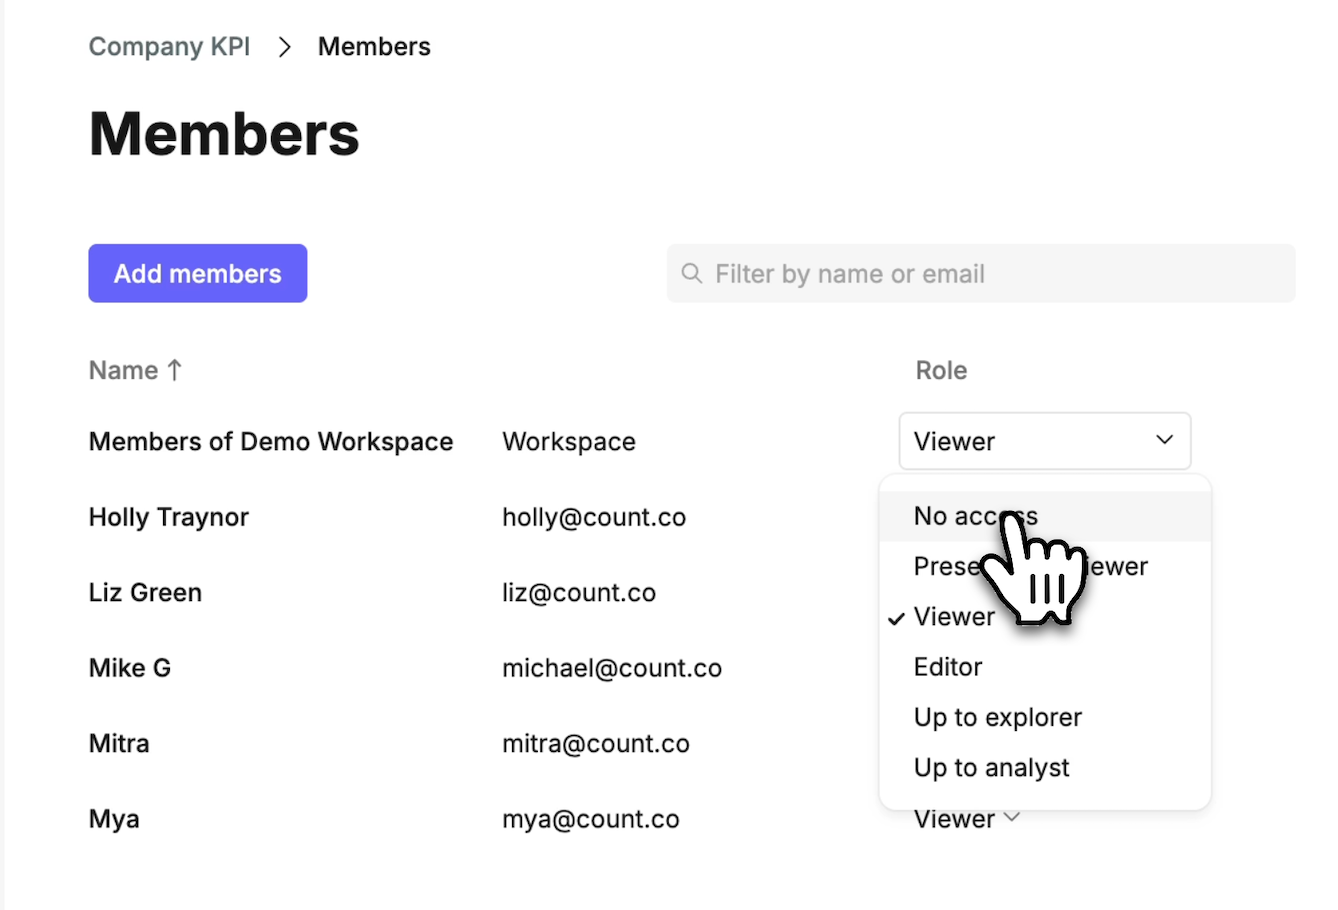
2. Assign workspace roles - As a workspace owner, you can manage workspace roles and permissions, and invite other members and guests.
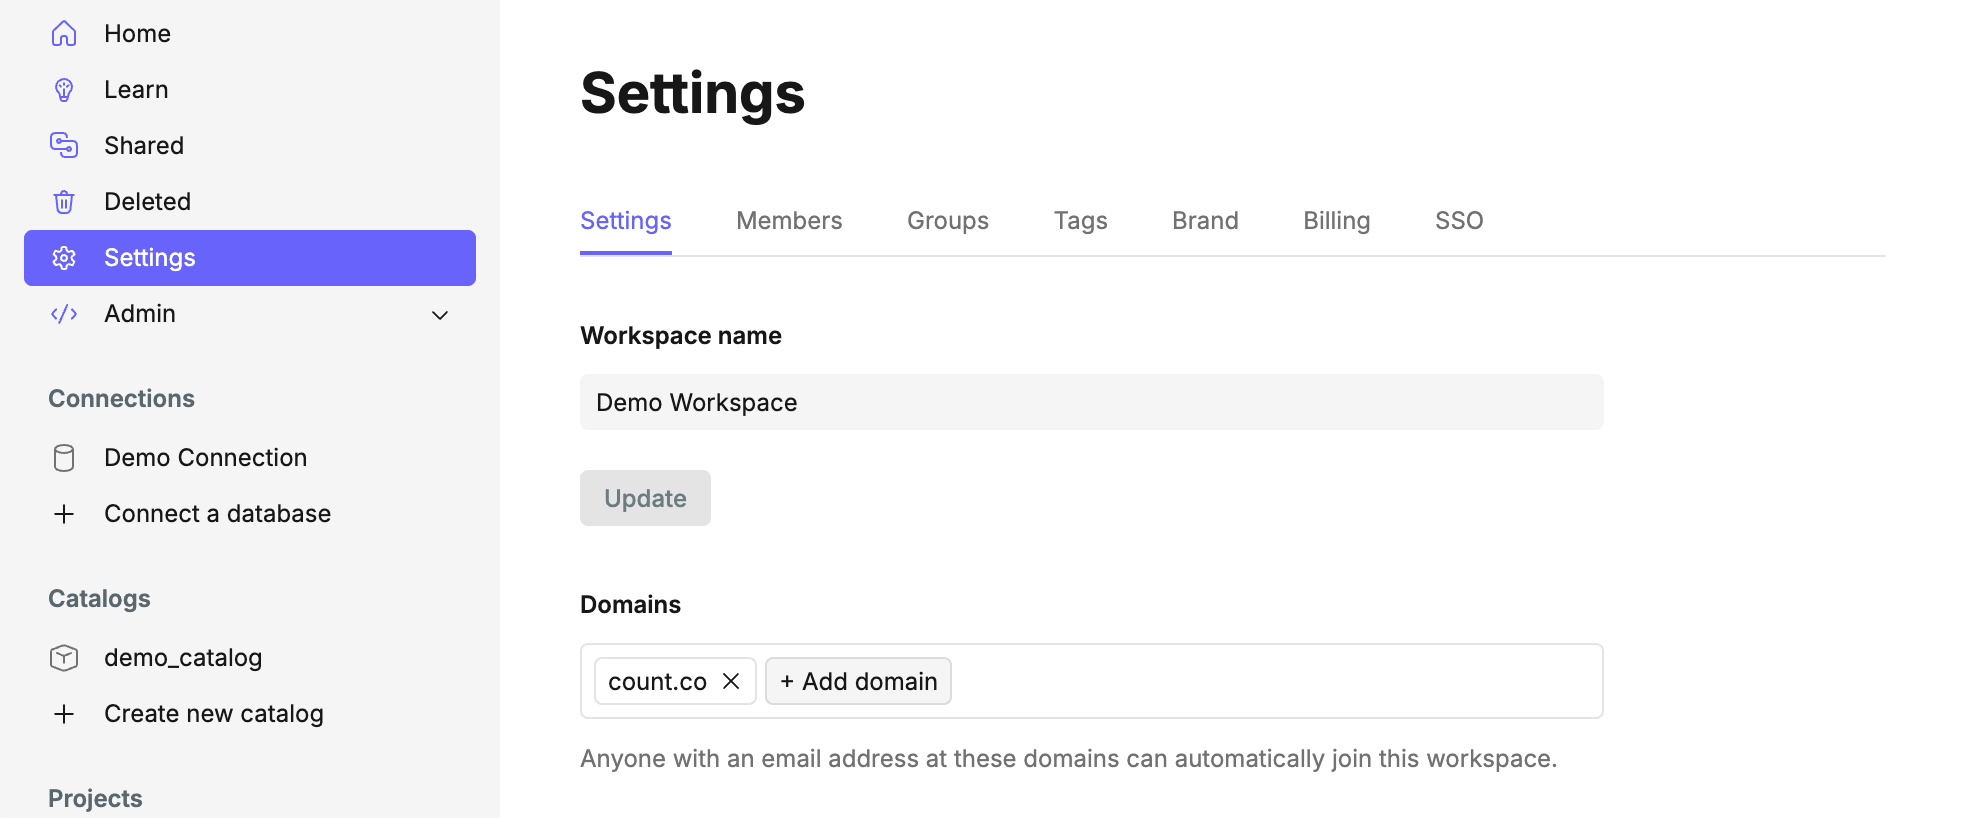
3. Add domain whitelisting - save time and use email domain whitelisting to invite team members to your workspace.
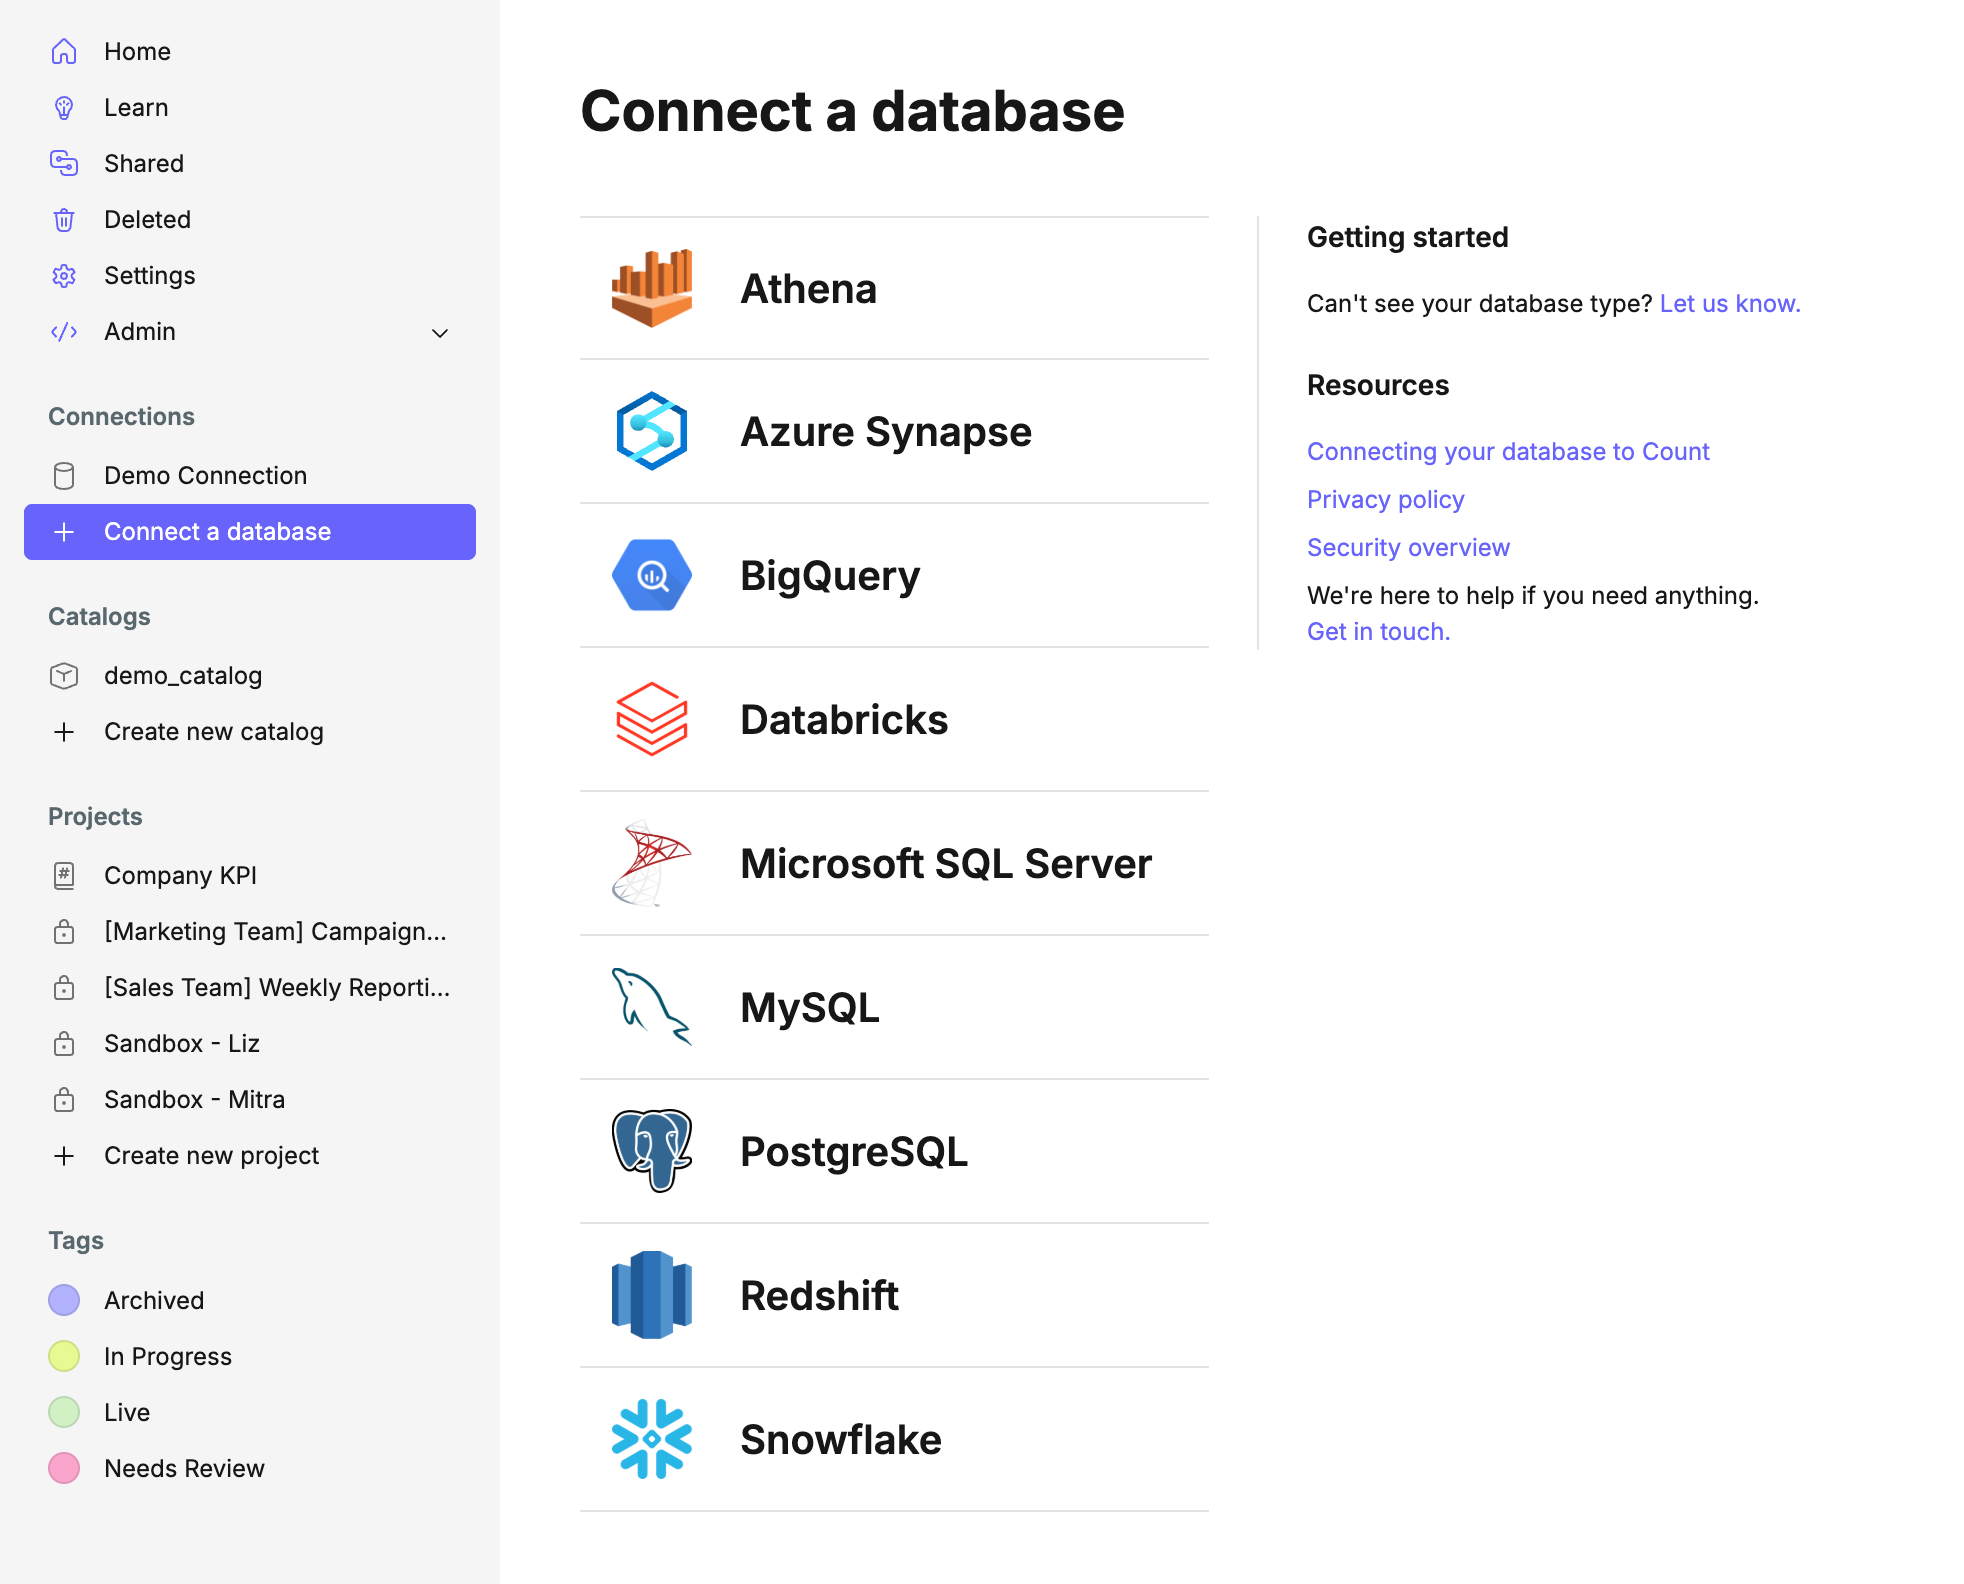
4. Connect your data sources - you can connect to multiple datatypes and even define and manage metrics with Count's semantic layer.
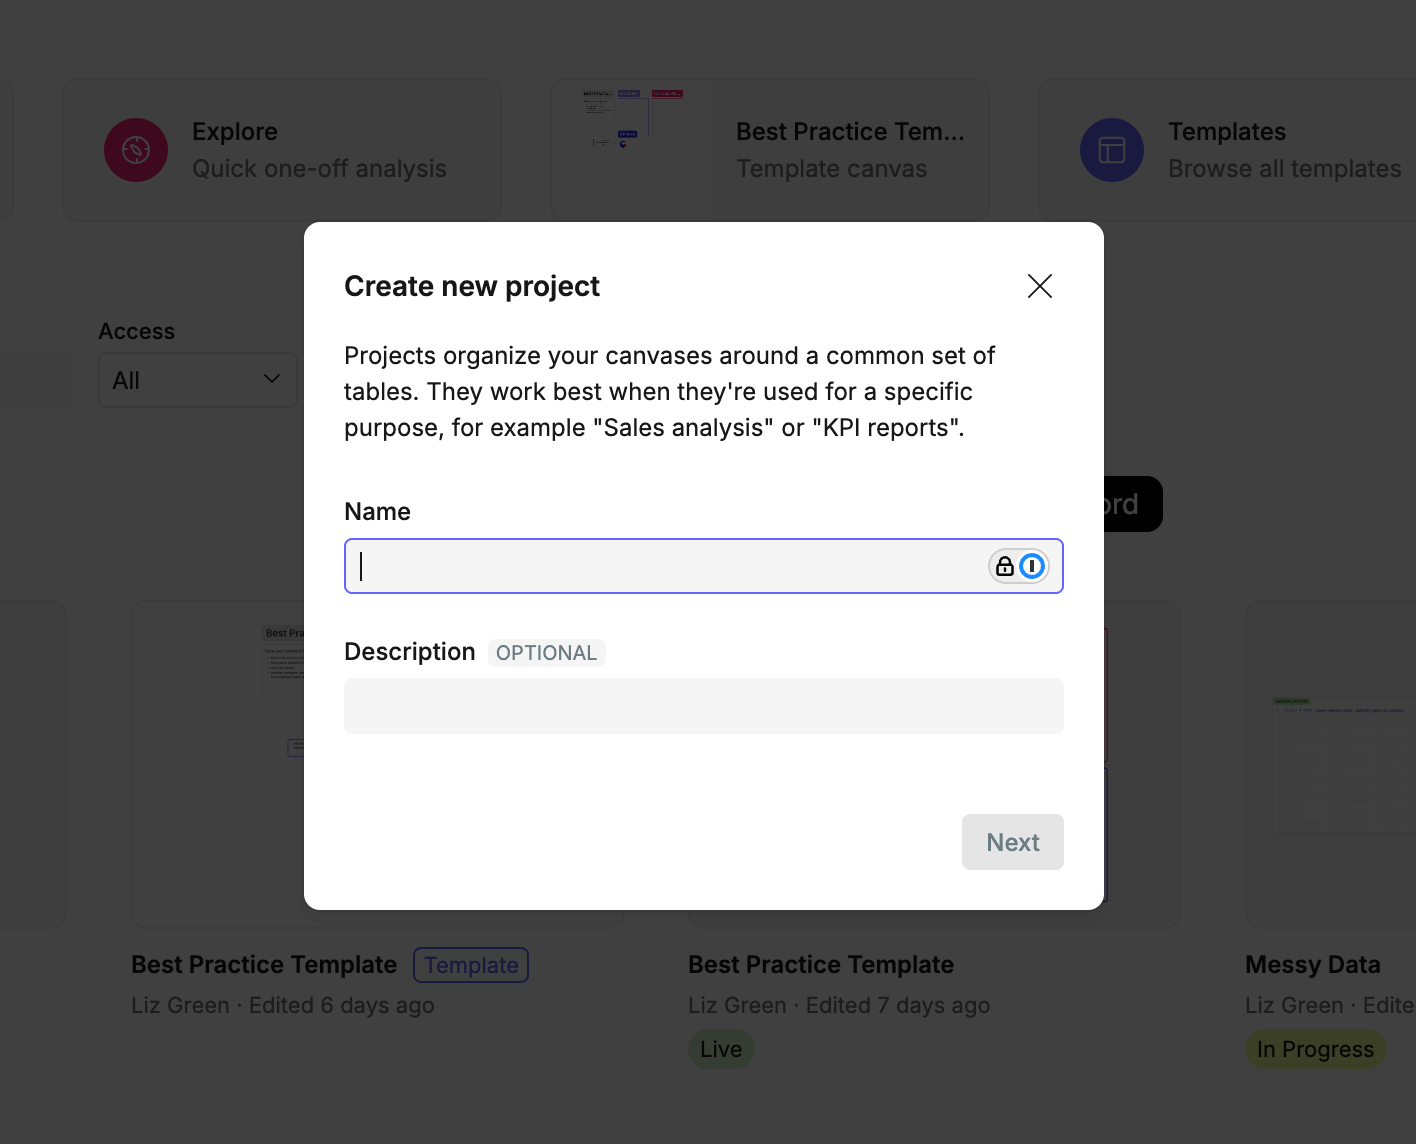
5. Create projects - projects are spaces to help organise your canvases. You can use naming hierarchies to group canvases methodically and organise them into the right space. This could include projects for individual, department / initiative, and company-wide work.
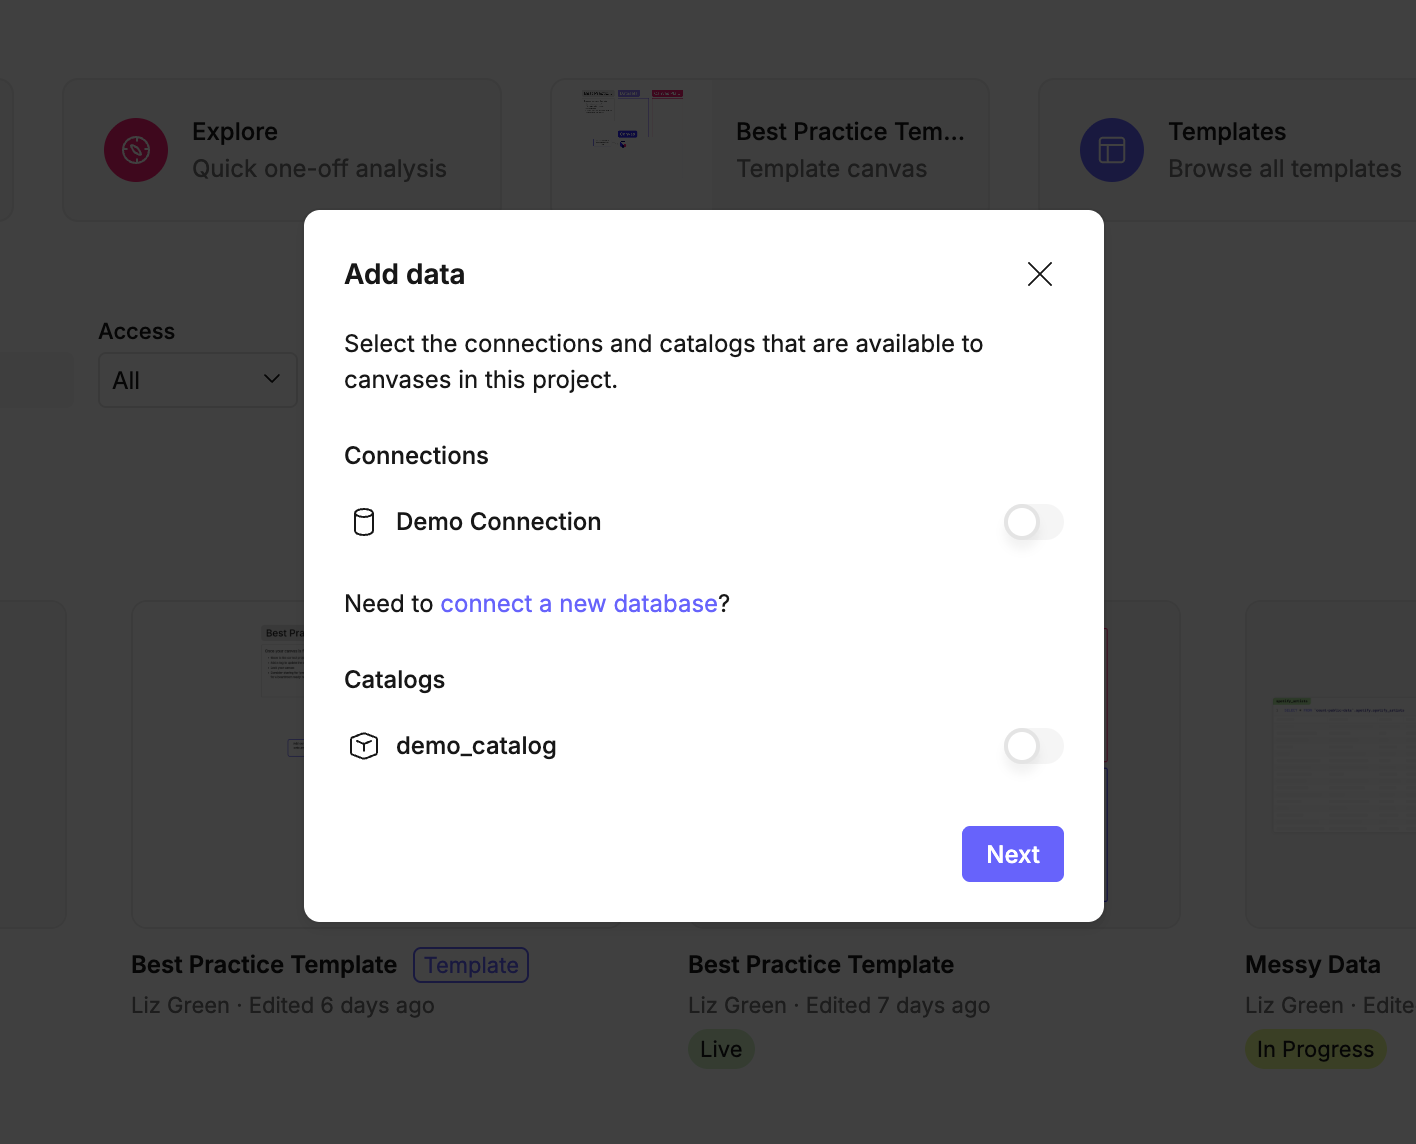
6. Add data to projects - Connect to the data sources relevant for that project.
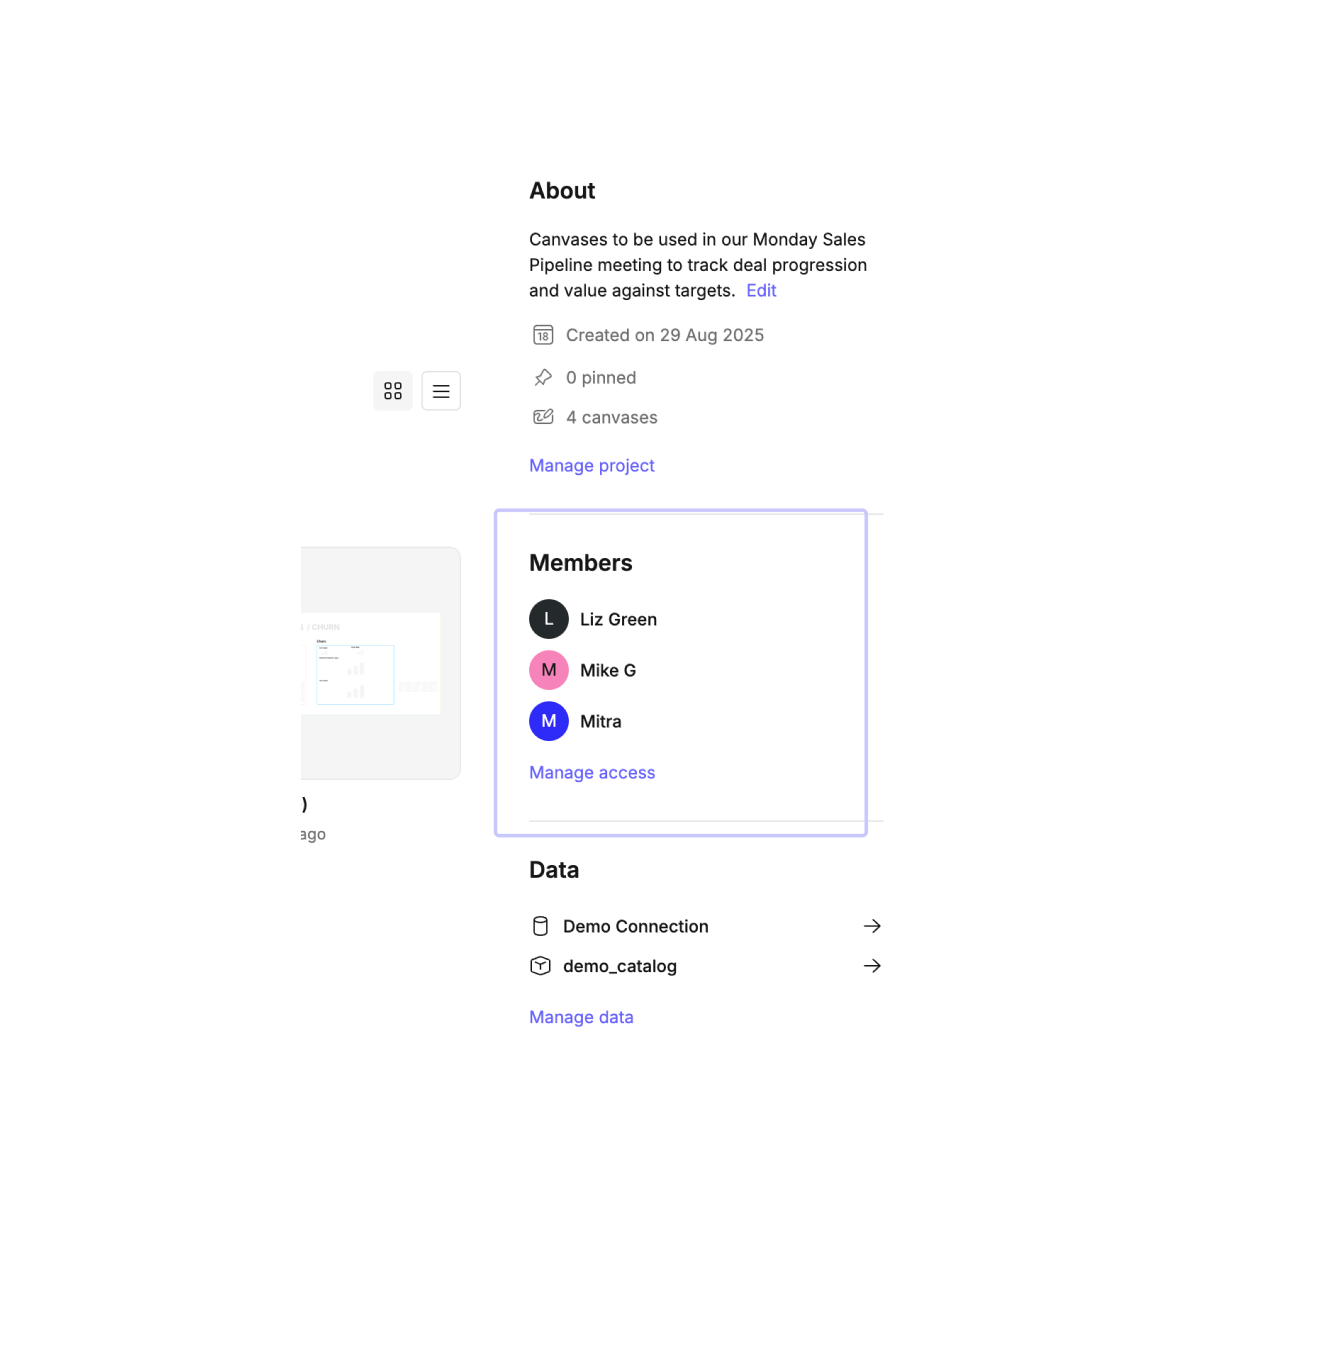
7. Manage access to the project - Decide which workspace members need access to the project and assign their project role.
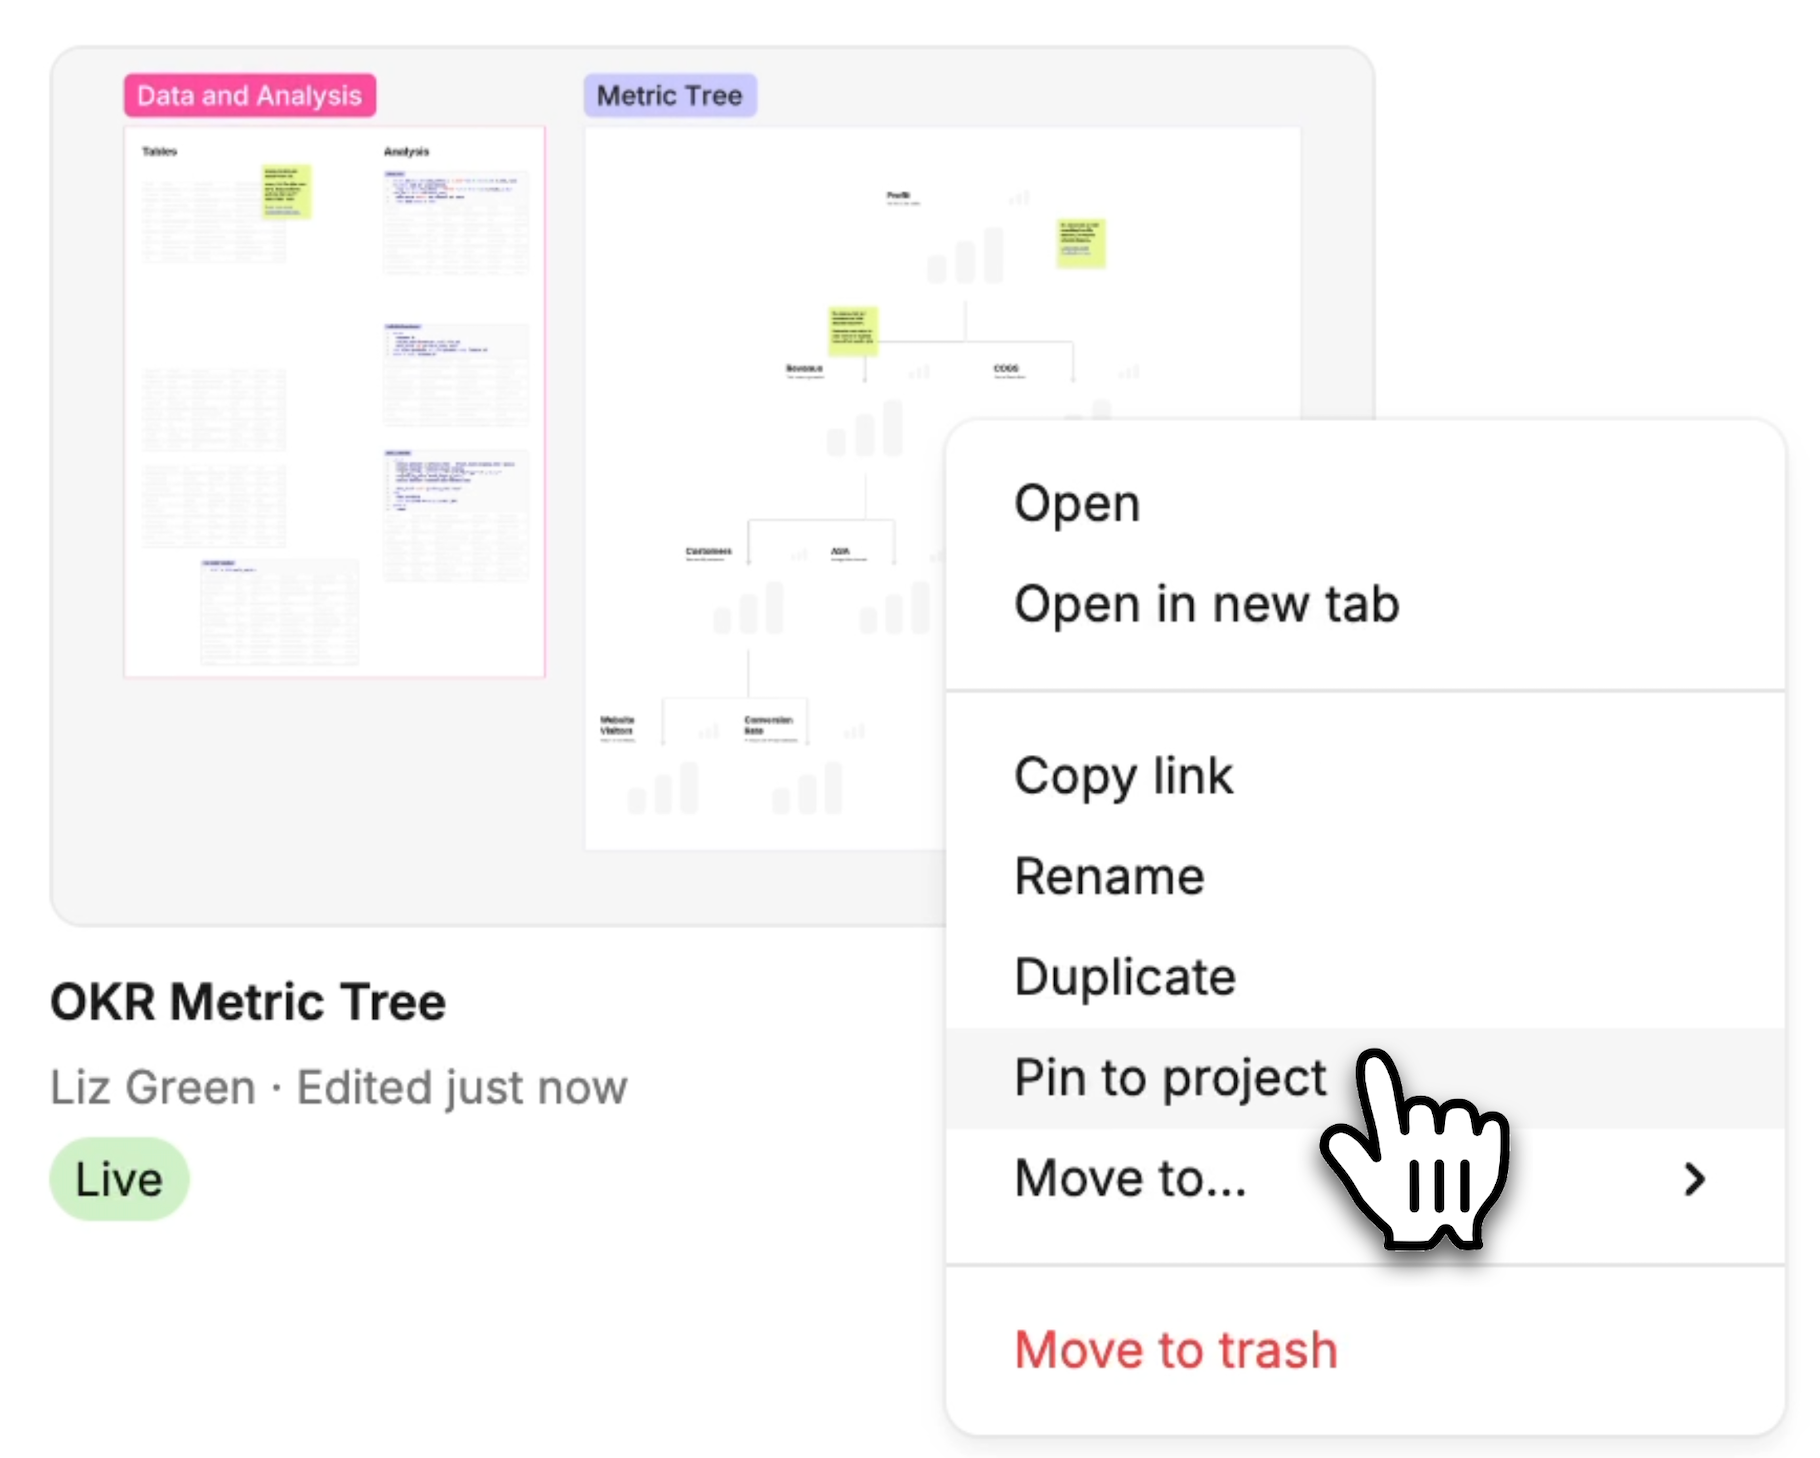
8. Create and pin canvases - click 'New canvas' in a project to add a canvas, and pin frequently-used ones for quick access to frequently used or important canvases.